Asterisk fake vendor in a billing system
Created by A. Martínez on 2019-02-06
4z.com
Table des matières
Asterisk fake vendors in a billing system
Billing system configuration (ASTPP)
Motivation
This document aims at faking vendors in a billing system by means of an Asterisk server. In this particular case, our billing system is ASTPP, however, this is a general procedure that could be done in any billing system.
Fake a vendor in Asterisk
The first thing to do is to install Asterisk in a new server. It is advisable to use a VPS. You can follow this doc to install Asterisk:
http://docs.switzernet.com/3/support/180920-how-to-configure-asterisk-for-calling/
We want Asterisk to act as an automatic answering machine. For this purpose, we have to create customers to be called in Asterisk, and then, modify the extensions in order to automatically get the call and put some music on hold.
Go to /etc/asterisk/ and open the “users.conf” file.
1. cd /etc/asterisk
2. vi users.conf
We are going to add three users: 500001, 500002 and 500003. All these users will belong to the same context: test55 (this name doesn’t matter, it is just a random name, we could choose whatever name for the context as long as the extensions are defined with the same context name).
We add these users at the end of the file (for example), with the following parameters. Be aware that the 51.75.31.95 IP, is the IP of the billing server, and should be changed if this server has a different one.
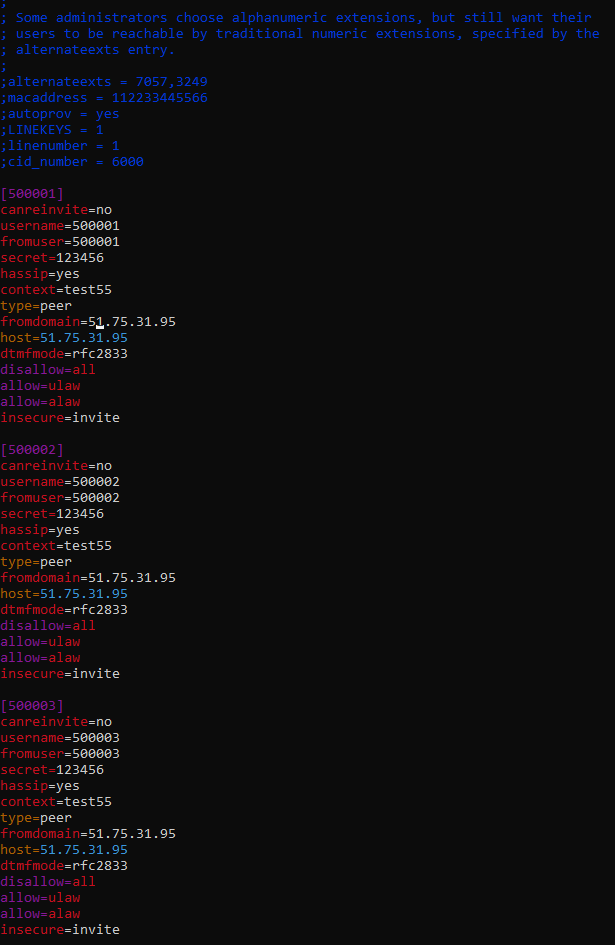
[500001]
canreinvite=no
username=500001
fromuser=500001
secret=123456
hassip=yes
context=test55
type=peer
fromdomain=51.75.31.95
host=51.75.31.95
dtmfmode=rfc2833
disallow=all
allow=ulaw
allow=alaw
insecure=invite
Once we have added some users to be called, we can now modify the extensions. Go again to /etc/asterisk/ and open the “extensions.conf” file.
1. cd /etc/asterisk
2. vi extensions.conf
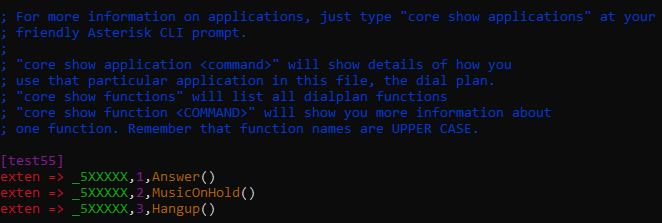
We are going to define very simple instructions to apply to calls to the numbers inside the defined plan. We are going to answer the call (“Answer()”), play music on hold (“MusicOnHold()”), and finally hang up the call (“Hangup()”). In reality, the “MusicOnHold()” function will play to infinity, so the “Hangup()” function has not too much sense. Remember that “[test55]” should contain the same context name defined for the users, so that the instructions can be followed when they are called. Again, we put these lines at the end of the file (for example).
Billing system configuration (ASTPP)
The next thing to do, is to add the previously configured Asterisk server as a gateway, and then, as a trunk. We get into the ASTPP web interface, and, Switch --> Gateways --> Create. We fill the gaps with the following:
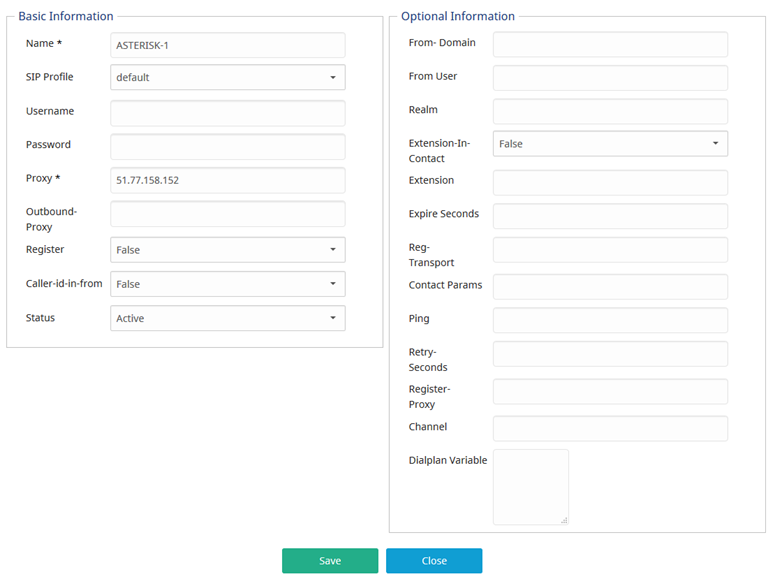
We just choose the name we want for the gateway, and obviously, the “Proxy” gap must contain the IP of our Asterisk server. The rest of the fields should remain as shown in the previous picture.
Let us create a new trunk. Go to Carriers --> Trunks.
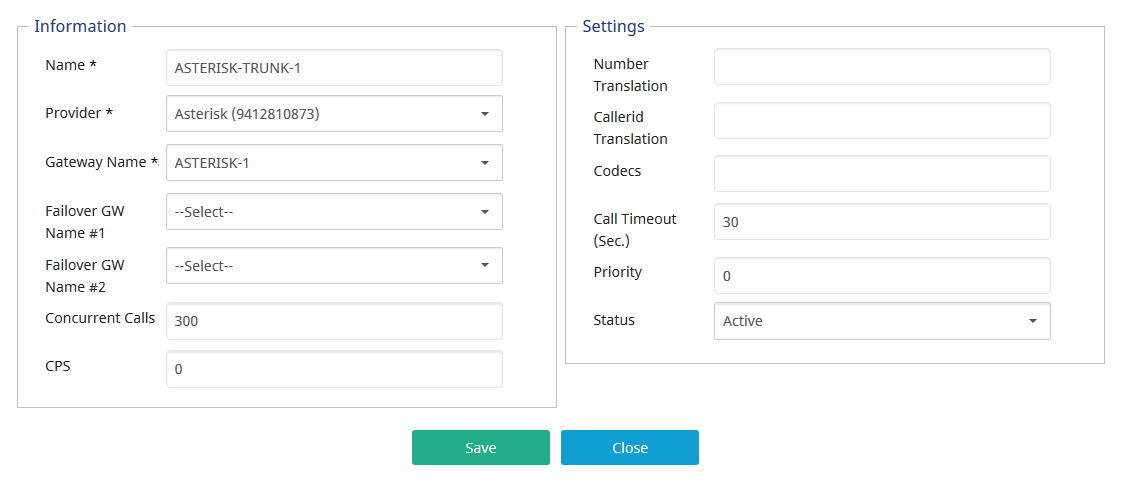
Again, we can set the name we want for the trunk. Regarding the provider, we have created one specially for occasion which is selected (to create provider --> https://astpp.readthedocs.io/en/v3.6/Modules/Accounts/list_account.html). Obviously, we must attach the trunk to the already created gateway. The rest of the fields are optional. In this case, for example, we allow this provider to have 300 calls at the same time.
Then, we have to create a rate group. Go to Tariff --> Rate groups --> Create.
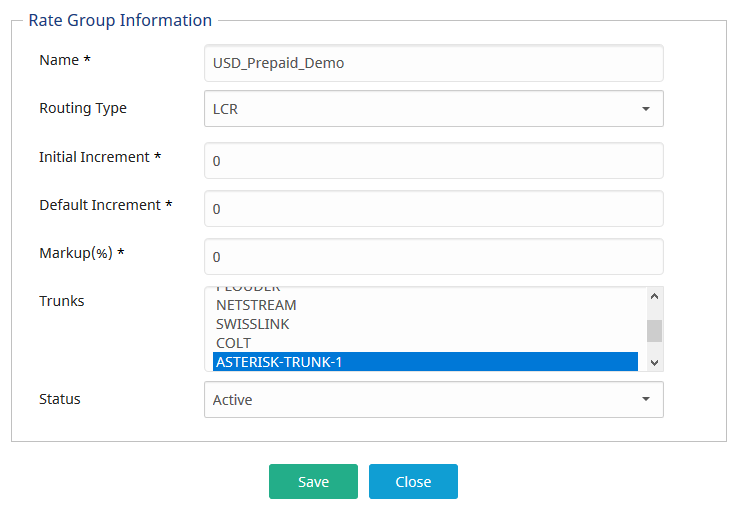
We set a new rate group name, and we select the previously created trunk.
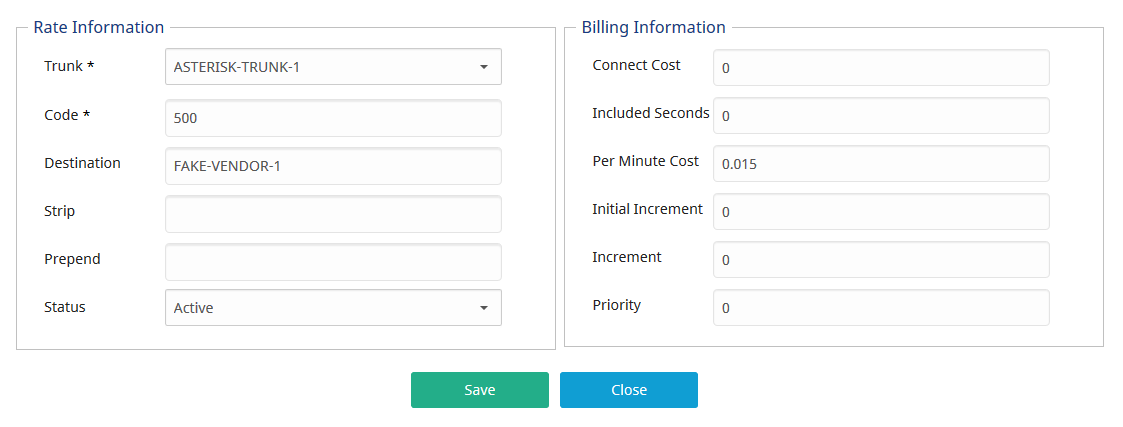
Now, we have to define the selling rate, and the buying rate for the prefix of the users we have created in the “users.conf” in Asterisk. Remember that the numbers were 500001, 500002, and 500003, so let us create the prefix “500” (could be “5” or “50”, but in this case we have already loaded these prefixes in our rate list, and we do not want to mess things up). Tariff --> Origination Rates --> Create.

Then, we have to do a similar thing with the buying rate counterpart. Carriers --> Termination Rates --> Create.
Remember that we must set a termination rate (the rate at which carriers charge us) lower than the origination rate (the rate at which charge our customers), otherwise, the call will not pass.
Do a call
At this point, we are ready to do a call, and check if the asterisk fake vendor is working. To do so, register yourself with a SIP account already created in the billing system. Once you are registered with your softphone or hardphone, just call one of the three numbers created in the “users.conf”.
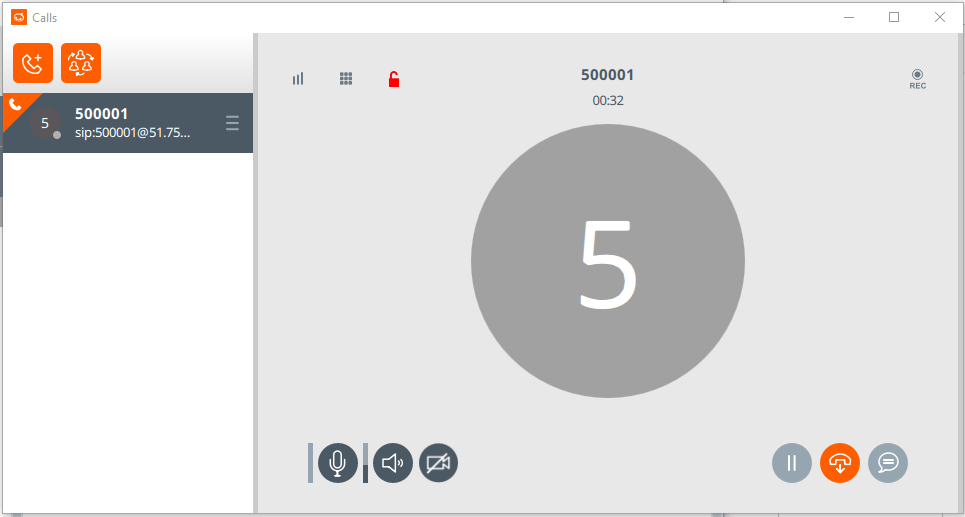
Almost instantaneously, the call will be answered automatically, and some funny music will play. If you do not cut the call, you will we listening to this music to infinity.
Let us check if the call appears correctly in the ASTPP live call report. Call Reports --> Live Call Report.
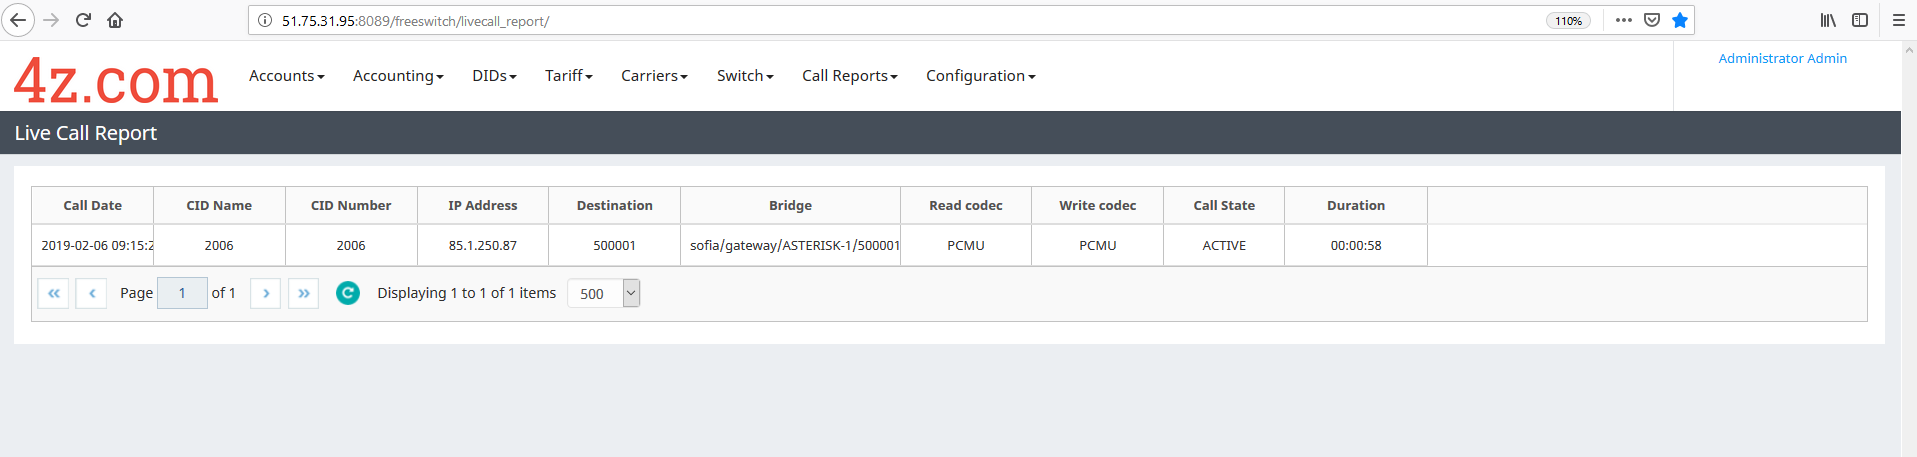
As expected, we can observe our active call.
Once we cut the call, obviously, it must be shown in the CDRs. Call Reports --> Detail Reports --> Customer.

And finally, we can see the call that we have passed through the Asterisk fake vendor.
This procedure could be repeated to add the number of fake vendors we want. Also, we can define/modify the users in the fake vendor just rewriting the “users.conf” in Asterisk.