Installing Teles Gate Manager
Download and install the Teles Gate Manager v14 [zip]. Check the references section for a latest version.
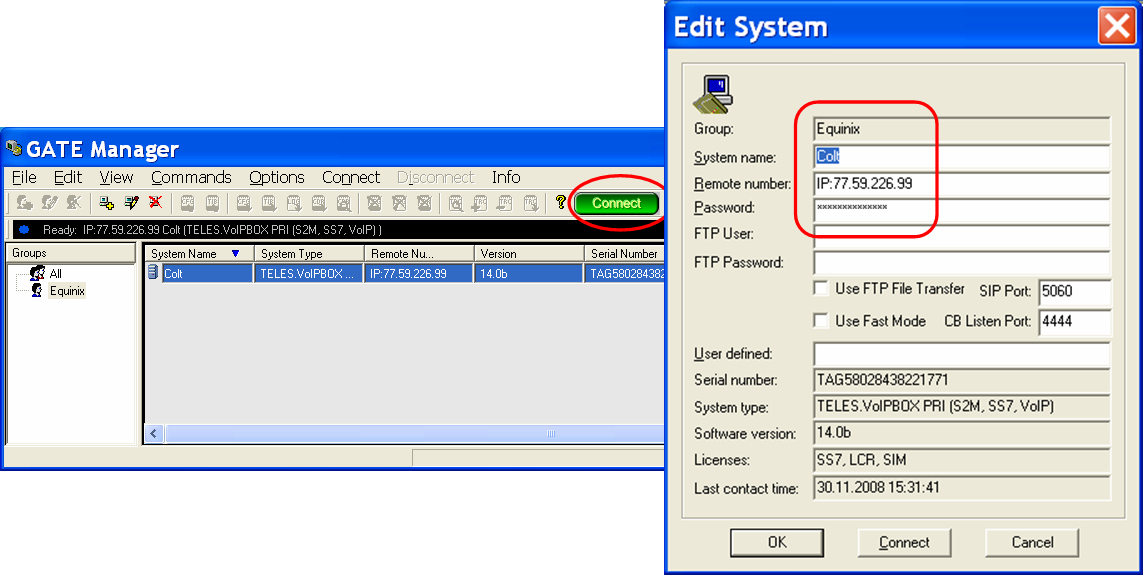
Gate Manager can be used to access configuration files, view port status, connected calls, and statistics of the Teles gateway. Once gate manager is installed and is launched, right click on the left side of the screen (white area) and choose new group: enter the new group name (Equinix is the datacenter in Zürich housing our Teles gateway). Left click the new group and then right click the right side of the screen (Grey area) and choose new system: enter a system name (e.g. Colt). Under remote number enter the Gateway’s IP address. Note, before entering the IP address you need to enter “IP:”
Select the system, and press [Connect]. Open the [Directory] menu in the remote system. There, you will see several files. The system uses “ip.cfg” file for its local network settings, “pabx.cfg” file for the settings of its controllers and ports, and “route.cfg” file for all in/out VoIP connection profiles, for routing instructions, and number translation rules. In scope of this exercise, we will work with “route.cfg” file only.
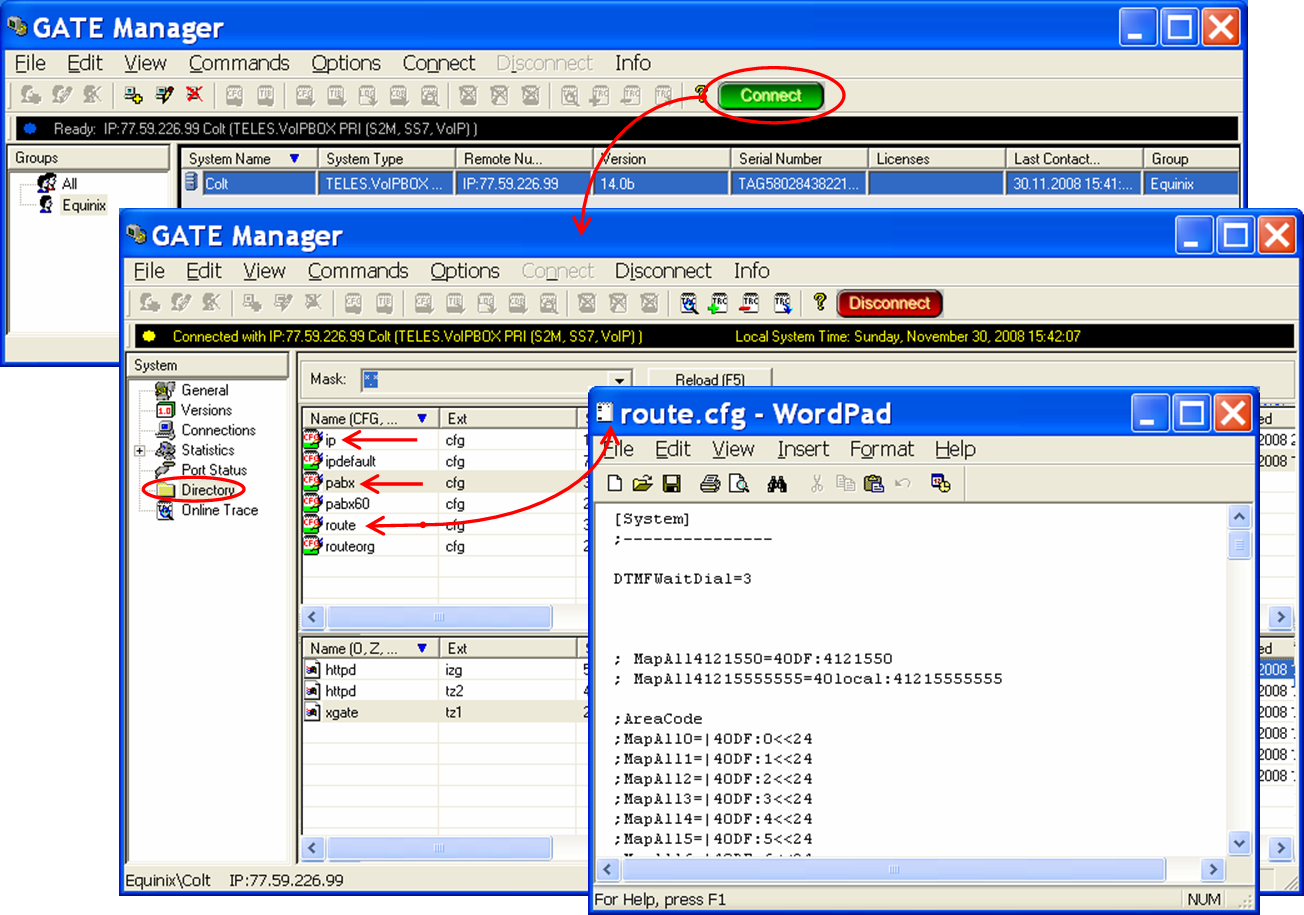
In order to make modifications in the file, double click on the file from within the interface and open it. Edit the file and save it. For the moment the file is saved locally in your computer only. Right-click in the Gate Manager within the area where the configuration files are displayed, and choose [Send] from the pop-up menu. Select the route.cfg local file and click on [Open] to upload it back into the system.
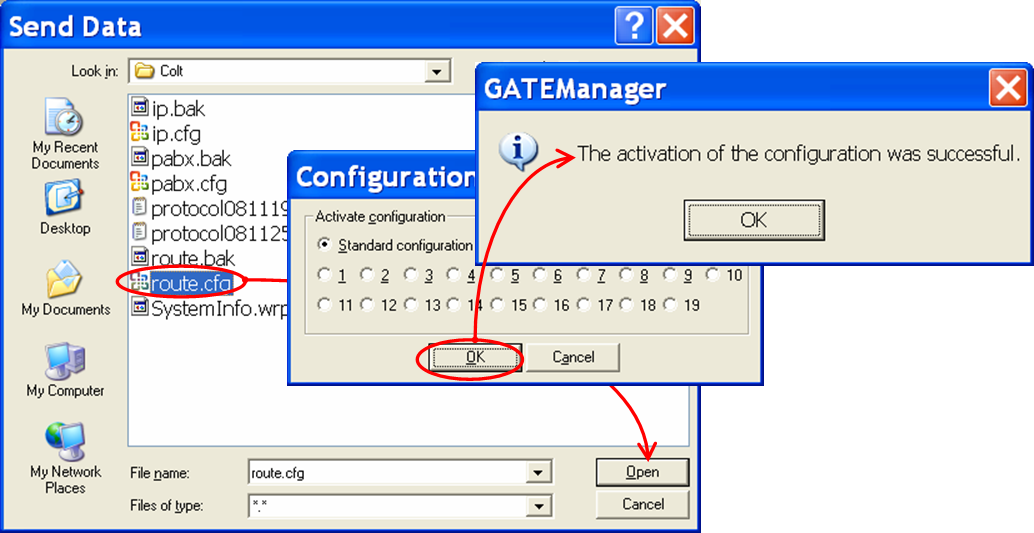
Your modifications are in force, as soon as the uploading is complete.
* * *

Copyright © 2008 Switzernet